Who Sanitizes the Water Cooler at Your Workplace?
- Arizona Pure Water

- Jul 8, 2020
- 2 min read
Updated: Jul 8, 2020
SUPPLIES NEEDED:
Clean rubber gloves
Paper towels
Lint-free towel
Plastic Scrub Brush
Teaspoon Measuring Spoon
Calibrated container (2 gal pail)
Unscented household liquid bleach
Clean 1 gallon container filled with bottled water
Never use soap/detergents, steel wool or other abrasives on your reservoir.
Instruction:
UNPLUG the power cord.
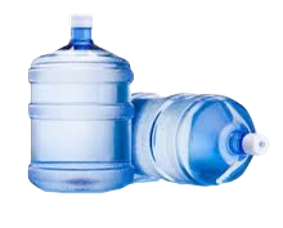
Remove the bottle from the cooler. If there is water in the bottle, make sure you cap or cover the bottle for re-use.
From the COLD FAUCET drain all the water from the cooler into a bucket and discard the water
Remove the cooler top. if the cooler is equipped with a no-spill device, it may need to be removed first. Look in the reservoir and see if there is a removeable baffle ( see reference image). If so, remove the baffle.
If there is water remaining in the cold water chamber, drain it out. If the reservoir has an ice ring in it , add hot water to melt the ring and completely drain the reservoir. DO NOT spill water outside of the reservoir into the interior of the cooler.
Prepare the cleaning solution in the calibrated container; add 1 teaspoon of unscented household liquid bleach to each 1 gallon of water.
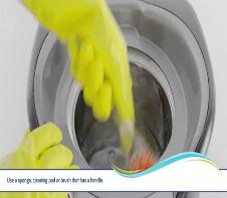
Wearing clean rubber gloves immerse the lint-free towel and/or scrub brush in the cleaning solution. Squeeze all excess cleaning solution from the towel and aggressively clean all surfaces of the reservoir interior. DO NOT pour the cleaning solution directly into reservoir.
To rinse the reservoir, carefully fill the reservoir with bottled water from the one gallon container until it reaches 1/2 inch from the top of the reservoir. Next, drain the "rinse" water from the reservoir through the COLD faucet.
Use the same cleaning solution brush and/or cloth to clean the baffle, the cooler top, removeable drip tray and faucets. If your cooler is equipped with a no-spill device, it should be cleaned with the same cleaning solution. Use the clean 1 gallon container filled with bottle water to thoroughly rinse these parts.
Wearing clean rubber gloves, re-install all parts: baffle, cooler top, faucets if removed and no-spill device (if equipped).
Place a bottle back on the cooler and drain two cups of water from each faucet, or until there is no evidence chlorine taste and/or odor. Dry an excess water that has spilled on the cooler and /or floor.
Plug the cooler back into the electrical outlet. Allow at least forty- five (45) minutes for the water to reach appropriate temperature.
Cleaning instructions are care of the IBWA (International Bottled Water Association) pamphlet #05-04.
YOU ARE NOT ALONE! BOTTLED WATER COMPANIES DON'T SAY ANYTHING ABOUT CLEANING, OR NO ONE WOULD SIGN UP BECAUSE YOU DON'T HAVE TIME!


Comments